
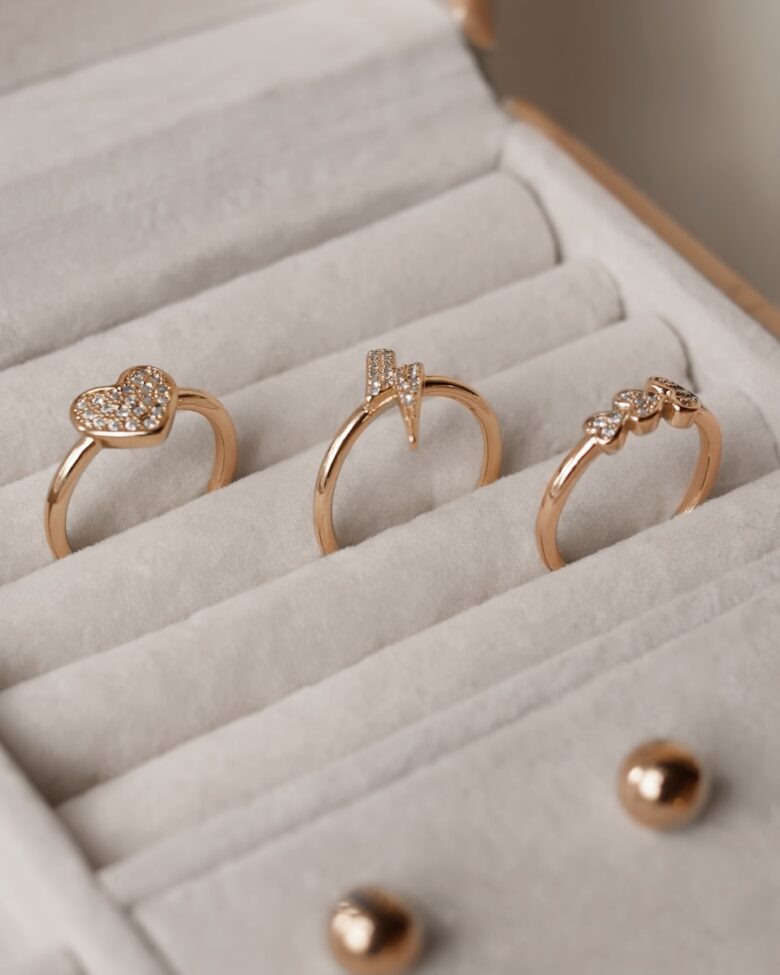
Most gold jewelry isn’t ruined by wear-it’s ruined by “quick fixes.” Toothpaste that scratches a mirror finish. Baking soda that leaves micro-abrasions. Harsh cleaners that loosen stones, dull plating, or creep into tiny gaps and damage settings. Gold may be chemically stable, but many pieces aren’t pure gold, and even solid gold can suffer when you treat it like a kitchen utensil.
Why gentle routines usually work better than quick fixes
From my experience, most damage to gold jewelry doesn’t happen because people don’t clean it, it happens because they try to clean it too aggressively. I’ve seen pieces that were in good condition lose their shine after just one attempt with the wrong product or too much pressure. What made the biggest difference over time was not using stronger methods, but sticking to simple and controlled routines that respect the material and its finish.
I also think it’s important to understand that not every piece should be treated the same way. Some items handle a gentle wash well, while others, especially plated or with stones, need a much lighter approach. When there’s any doubt, I’ve found it safer to do less rather than more. A practical habit that helps a lot is taking a few seconds to check the piece before cleaning, looking for loose parts or worn areas. This small step can prevent accidental damage and helps you know when it’s better to stop and get professional help.
Cleaning your jewelry at home should restore shine without gambling with its value. The difference comes down to understanding what you’re actually cleaning: solid gold vs. gold-plated, polished vs. textured, plain bands vs. gemstone settings. One wrong method can turn a simple refresh into permanent haze, worn edges, or a wobbly stone that needs a jeweler.
In this guide, we break down what’s safe to use (and what to avoid) for gold, explore the nuances of cleaning different types of gold jewelry and common settings, and provide a framework for a step-by-step routine that lifts residue, protects finishes, and restores shine-without damage.
Identify Your Gold Type and Settings: Cleaning Solid Gold, Gold-Plated Pieces, and Gemstone Jewelry Safely
In early spring, a client brought me a “solid gold” chain that kept turning dull after every at-home clean. I ran a quick check with a pocket spectro-calibrator – a device verifying metal composition – and the readout showed a plated base with worn edges, plus lotion buildup trapped in the links. That one scan prevented the classic mistake: scrubbing gold-plated jewelry like it’s a 14K bracelet and stripping the finish in minutes.
Before any soap touches your piece, identify what you’re actually cleaning: solid gold (10K-24K), gold-plated/vermeil, or gold set with gemstones. At the consumer level, use your phone’s macro mode and a hallmark scanner app – camera-assisted stamp detection – to look for “10K/14K/18K/750” (solid), “GP/GEP” (plated), or “925 + vermeil” (gold over silver). Practical observations from this quarter’s bench work show three safe rules: plated pieces get the gentlest contact only; solid gold tolerates mild detergent and soft brushing; gem settings require stone-specific caution because oils, heat, and certain cleaners can cloud or fracture them. For quick decision-making, use this reference:
| Jewelry Type | What It Is | Safest Home Method | Avoid |
|---|---|---|---|
| Solid Gold (10K-24K) | Gold alloy throughout | Warm water + mild dish soap; soft toothbrush for crevices; rinse, pat dry | Abrasive pastes; stiff brushes on high-polish |
| Gold-Plated | Thin gold layer over base metal | Damp microfiber only; brief wipe; dry immediately | Soaking; scrubbing; ultrasonic cleaners |
| Gemstone Jewelry | Gold + stones + adhesives/prongs | Soap-and-water only for hard stones (diamond, sapphire, ruby); minimal agitation | Steam/ultrasonic for opal, pearl, emerald, turquoise; alcohol on glued settings |
At the pro level, I confirm risk points with a micro-loupe camera – magnification for hairline cracks – checking prong tips, plating wear, and any “gap shadow” around stones that suggests a loosened seat. In an integrated ecosystem, a smart humidity dock – controlled drying without heat – prevents water spots and reduces tarnish recurrence, while a routine reminder automation – scheduled care nudges – times gentle wipes after sunscreen-heavy days (a common culprit for dulling). If you’re unsure whether a piece is plated or if a stone is fracture-filled/treated, default to the least aggressive option: microfiber wipe only, no soaking, and book a jeweler inspection before deeper cleaning.
The Gentle At-Home Gold Jewelry Cleaning Method: Soap, Warm Water, and Soft Brushes (Step-by-Step)
In early spring, I was asked to rescue a family signet ring that had gone dull after a “quick clean” with a citrus household spray. A quick pass under a handheld macro-lens camera – magnifies surface scratches confirmed the haze was residue, not wear, so I reverted to the gentlest protocol I trust in my own lab: soap, warm water, and a soft brush-done slowly and predictably.
Step-by-step (gentle, at-home safe for solid gold and most plain gold pieces)
1) Prep a bowl: warm water (not hot) + 2-3 drops mild dish soap; swirl, don’t froth.
2) Soak 10-15 minutes to loosen skin oils and lotions (longer isn’t better).
3) Brush lightly: use a baby toothbrush or ultra-soft brush; move with the metal’s contours.
   - Focus on crevices: behind settings, inside bands, link junctions.
4) Rinse thoroughly under a low, lukewarm stream; keep the drain plugged.
5) Dry: pat with lint-free microfiber; air-dry 10 minutes before storing.
6) Optional shine check: buff gently with a clean microfiber-no polishing compounds.
Practical observations from this quarter’s workflows show most “gold cleaning damage” at home comes from too much heat, too much abrasion, or leaving soap film behind-so your goal is controlled contact time and soft mechanical action. For a consumer-level safety net, a phone’s macro mode – reveals hidden residue helps you spot remaining grime before you scrub harder; pros often verify metal and plating status with a pocket XRF scanner – identifies alloys instantly to avoid over-brushing thin plating. In an integrated setup, a smart ultrasonic timer plug – prevents over-clean cycles can automate reminders and keep you consistent, but for this method, the best “automation” is simply a short, repeatable routine; if your piece has porous gemstones (opal, pearl), glued settings, or visible plating wear, stop at the soak-and-rinse stage and switch to professional evaluation.
| Tier | What you use | How it helps | Common mistake to avoid |
|---|---|---|---|
| Consumer | Mild soap, warm water, soft brush; phone macro mode | Removes oils safely; confirms cleanliness visually | Scrubbing like a scouring pad |
| Pro | Pocket XRF scanner; calibrated loupe | Confirms alloy/plating; detects micro-scratches early | Treating plated gold like solid gold |
| Ecosystem | Smart ultrasonic timer plug; care-log app | Standardizes intervals; reduces over-cleaning | Letting “more cycles” replace gentle technique |
Mistakes That Scratch or Tarnish Gold: What to Avoid (Toothpaste, Baking Soda, Ultrasonic Cleaners, and Harsh Chemicals)
In early 2026, a client brought me a “dull” 18K chain that had been scrubbed with whitening toothpaste and a stiff brush; under my pocket digital loupe – reveals micro-scratches fast, the surface looked like frosted glass. My fix wasn’t a stronger cleaner-it was stopping the abrasion, then restoring surface brightness with controlled, non-scratching techniques and a gentler wash routine.
The biggest at-home culprits are products designed to abrade or strip, not “clean.” Gold itself is soft (especially higher karats), and many gold pieces include alloys, rhodium plating, solder seams, gemstones, enamel, or antique patina that react badly to aggressive methods. Avoid these friction-and-chemistry traps:
- Toothpaste (especially “whitening”): contains silica/alumina micro-abrasives that haze polished gold and can lodge in prongs and filigree.
- Baking soda and DIY “scrub pastes”: creates uneven abrasion; can dull high-polish finishes and stress thin plating.
- Ultrasonic cleaners: vibration can loosen stones, aggravate existing cracks, and shake out fragile pavé settings-risk spikes with emeralds, opals, pearls, and glued-in components.
- Harsh chemicals (chlorine bleach, ammonia-heavy formulas, acetone, drain cleaner): can pit alloys, discolor solder joints, and damage coatings, adhesives, and soft gemstones.
| What to avoid | Why it scratches/tarnishes | Consumer-level alternative | Pro-level / ecosystem safeguard |
|---|---|---|---|
| Toothpaste | Micro-abrasives create haze | Warm water + mild dish soap + fingertips | Ring inspection mode – camera macro clarity to confirm no surface haze before/after |
| Baking soda paste | Uneven grit scratches high-polish | Soft microfiber cloth only (no scrubbing compounds) | Microfiber weave scanner – verifies cloth softness for delicate finishes |
| Ultrasonic cleaner | Vibration loosens stones/prongs | Gentle soak; soft baby toothbrush only on plain gold | Setting-stress estimator – predicts loosening risk using photo-based prong analysis |
| Bleach / strong ammonia | Pits alloys; attacks solder/coatings | Rinse immediately if exposed; stick to pH-neutral soap | Smart rinse timer – prevents chemical dwell time via sink-side alerts |
Aftercare for Lasting Shine: Drying, Polishing Cloth Techniques, and Proper Storage to Prevent Dulling
In early 2026, I watched a client’s 18k chain lose its “just-cleaned” glow within 48 hours-nothing wrong with the wash, everything wrong with the aftercare. I ran a quick check using a handheld micro-roughness scanner – detects residue film fast and found a thin layer of detergent left behind, plus micro-scratches from an aggressive towel. Since then, I treat drying, cloth technique, and storage as the real “finish work” that determines whether gold stays luminous or turns flat.
Drying and polishing are about pressure, direction, and cleanliness-not force. Use a lint-free, non-terry microfiber, then switch to a dedicated jewelry cloth only after the piece is fully dry; trapped moisture invites haze and dullness, especially around prongs and links. On the consumer side, your phone’s macro camera mode – reveals hidden streaks is surprisingly effective for spotting water spots along edges before you “lock in” the film with polishing. For pro-level control, follow this repeatable sequence:
1) Pat-dry (don’t rub): press microfiber on surfaces and between links.
2) Air-finish: 10-15 minutes on a clean, shaded counter; avoid sunny windows (heat bakes residue).
3) Final buff: use straight strokes, one direction per area; rotate cloth frequently to a clean section.
4) Detail pass: soft brush only if needed; then re-buff lightly.
Storage is the anti-dulling strategy: gold itself is stable, but the alloys, surface films, and contact abrasion aren’t. In integrated home setups, a smart humidity puck – keeps boxes in range helps maintain ~35-55% relative humidity, reducing tarnish-prone conditions for mixed-metal pieces and slowing residue “bloom” from lotions. Choose a method based on how often you wear the piece:
| Storage Method | Best For | Prevents | Do This |
|---|---|---|---|
| Individual soft pouch | Daily wear rings/pendants | Micro-scratches from contact | Store one item per pouch; keep cloths separate |
| Fabric-lined box with dividers | Multiple pieces in rotation | Chain tangles, clasp wear | Lay chains straight; close clasps before storing |
| Zip bag + anti-tarnish strip | Occasional wear, travel | Airborne sulfur exposure, haze | Squeeze out excess air; replace strips on schedule |
- Cloth hygiene: retire polishing cloths when they feel “waxy” or gray-reusing a loaded cloth redeposits grime.
- Friction control: never store gold pieces touching; even 14k can mark from repeated movement in a drawer.
- Timing: store jewelry only after skincare fully absorbs; residual oils are a leading cause of rapid dulling.
Q&A
1) What’s the safest at-home method to clean gold jewelry without dulling it?
Use a “spa soak” that’s gentle but effective: mix warm (not hot) water with a few drops of mild dish soap. Soak the gold for 10-15 minutes, then use a soft baby toothbrush to lightly brush crevices. Rinse thoroughly under lukewarm water and pat dry with a microfiber cloth. Avoid paper towels (they can micro-scratch) and avoid boiling water, which can stress settings and loosen stones.
2) Can I use baking soda, toothpaste, vinegar, or alcohol on gold?
Skip them for routine cleaning. Toothpaste and baking soda are abrasive and can haze high-polish gold and scratch softer alloys. Vinegar is acidic and can discolor some alloys or damage certain gemstones. Rubbing alcohol is only occasionally useful for degreasing plain gold, but it can dry out porous stones and may weaken certain jewelry adhesives. For most pieces, soap-and-water plus a soft brush is the lowest-risk option.
3) How do I clean gold jewelry with gemstones (or pearls) without loosening or damaging anything?
Treat “gold + stones” as a different category. Use minimal soaking-30-60 seconds-then gently clean around the setting with a barely damp soft brush or cotton swab. Rinse quickly and dry immediately, paying attention to the underside of the stone where water gets trapped. Never soak pearls, opals, emeralds, turquoise, or any piece with visible glue; wipe those with a slightly damp cloth only. If a stone wiggles, a prong looks lifted, or you see gaps around the setting, don’t clean aggressively-get it inspected before you risk losing the stone.
Expert Verdict on How to Clean Your Gold Jewelry at Home Without Damaging It
Clean gold is at its best when it still looks like gold-warm, reflective, and unabraded. Gentle soap-and-water care, a soft brush, and a thorough rinse do more for lasting brilliance than any aggressive shortcut ever will. Treat your pieces like fine finishes rather than hard metal: avoid harsh chemicals, skip gritty pastes, and be extra cautious with gemstone settings and plated items, where “scrub harder” can quietly become “wear it away.”
Expert tip: make cleaning a tiny routine instead of a rescue mission. After wearing, give your jewelry a quick wipe with a clean microfiber cloth to remove skin oils and product residue before it has time to bind into a dull film. Once a month, do a two-minute check under bright light: if you see dark lines at prongs, a loose stone, or a clasp that’s starting to misalign, stop cleaning and schedule a jeweler’s inspection-those are early warnings where prevention costs less than repair. Store each piece separately in a soft pouch or lined box so shine isn’t lost to friction, and your “at-home clean” stays a safe refresh rather than a repeated fight against avoidable buildup.

is a specialized jewelry consultant and materials analyst with over a decade of experience in the luxury goods sector. Passionate about the intersection of metallurgy and modern design, Julian founded Moda Jewels to bridge the gap between technical industry standards and the everyday consumer.